As this is going to be my second article but my first ever website project article, I want to say thanks for checking it out. I will start off by telling you that I am not an English major and am not the world’s greatest writer, actually far from it. I will do my best though as I start writing this. All that being said, let’s get to the project.
Today’s article is over the Movie Poster Light Box. If you have not seen the video, then I recommend watching it before continuing to read. It should make this article easier to understand. First, this project is a project that is very special to me. I have wanted to make one of these for a long long time now. And I have designed several different types of these before I went with this design. This was most definitely the most expensive design out of all of them.
I did not have to buy any boards for this project. I had some MDF in the shop still from a couple of projects that I had built, so that took care of the frame and braces. The thin plywood backing was also laying in the shop, begging to be used. The black paint used in this projects was also already in the shop. I used it for another project for my home office. I did not make a video for that project.
Now the stuff that I purchased. I bought 2 boxes or “ropes” of LED lights, the aluminum tape, power supply for the lights, and finally the snap on poster frame. The poster frame was by far the most expensive part of this project. That frame alone was around $60. All of my other designs for this project avoided using that poster frame because of its cost. But at the end of the day (or in this case a year later) I decided that it was worth paying extra for this frame. Now that I am done, I can say that it was worth the money spent compared to what I was considering doing. Below are links to all the material I purchased, and I purchased it all through amazon.
Poster Frame
http://amzn.to/1o8mrDd
LED Lights
http://amzn.to/1o8mEGE
Power Adaptor
http://amzn.to/1oc5CrL
Aluminum Tape
http://amzn.to/1Qd7EUu
To start the project, I simply ripped my MDF to 3 inch sections. These would be cut to length later to makeup the outside frame. Once I had these cut to the final measurements, I then cut 4 braces to go on the back to their final length. 2 of the braces received 45 degree angle cuts on them for the French cleat style hanging system. Once I had all my boards cut to final length, I glued and screwed the outside frame together. Then I added the bottom brace board to the bottom of the frame. After that was in place I measured up 20 inches on each side and made a mark. That is where the bottom of the middle brace went. It was also glued and screwed. Once these 2 braces were in place and secured, the frame came into square. It wasn’t out of square by much, but once these braces were there, there was no question it was square. Then I added a small strip that would go around the inside of the frame. You can see that below. Since I was going to piece my back together I thought I needed the extra support. If you are not doing that, then I don’t think this part is necessary.

The next part is to add the back in. I glued and brad nailed the back pieces together. Once you are finished it will look something like this. And you can tell in this picture that it has been pieced together. After this was done I patched screw holes, sanded, and then painted my frame. I wanted to do all the finish work before I put the aluminum tape and LEDs down.

The next part is adding all of the aluminum tape. I am not sure what the best way to do this is, maybe just trial and error till you get some rhythm going. What I did for the back panel was cut a bunch of strips that would go the length of the back. Then put them down one after another. For the sides I found it much easier to cut 8-12 inch strips and put them down that way.

Once you get that done this is what you will see.
Adding the LEDs was very similar. I made a mark on each end of the poster frame of where I wanted my LEDS strips to go. Once I had those marked I was ready to start putting them down. Make sure that you don’t forget to drill a hole in the side or the back for your power cord to plug in. Those LEDs will need some power and I simply drilled a hole in the bottom corner for mine.

I was able to get 9 evenly spaced LED rows or columns in my box. I thought that this as good spacing and that is how far 2 boxes went. It would probably be a good idea to make sure that your LEDs work before you do this step. I would recommend plugging them in and making sure that they will turn on.
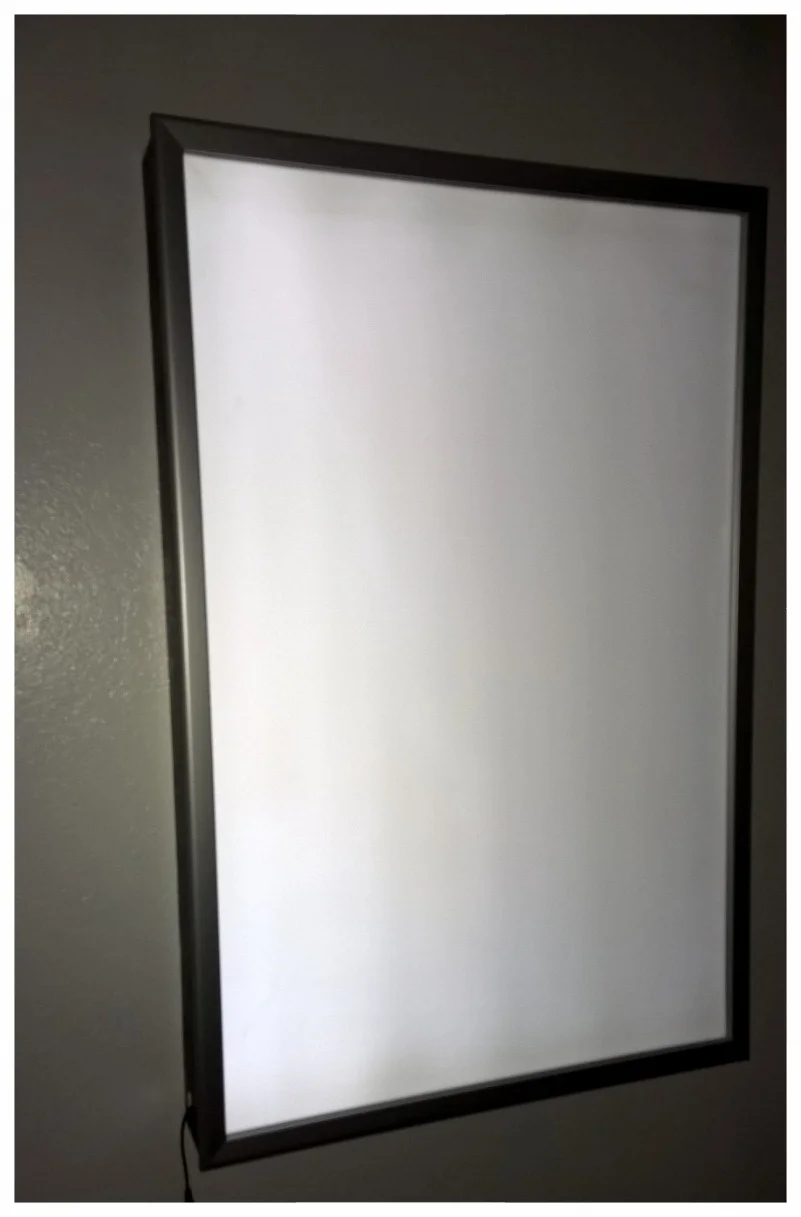
You’re almost done. The next step is going to be to attach the snap frame to the frame you just built. I used the screws that came with my snap frame. Once I had it in position where I wanted it I drilled and screwed it together.
The last step for me was attaching the other board that we cut at 45 degrees. It gets attached to the wall and the poster box will just slide on top of it and into place. I made sure to hit a couple of studs on my wall for extra strength. Slide your poster box on top of the cleat and you are finished. Time to add the poster and plug this bad boy in.

Subscribe on YouTube: https://www.youtube.com/user/StudioEp...
Follow me Twitter: https://twitter.com/MyNextProjects
Follow me Instagram: https://www.instagram.com/mynextproje...